Highlights:
- The most important factor is a properly prepared base. If the ground isn’t leveled and compacted correctly, the patio will eventually shift or sink.
- Choosing the right patio type early affects cost, difficulty, maintenance, and overall design direction.
- Good drainage is essential. Even a slight slope away from the house prevents water pooling and long-term damage.
- Patio strength comes from layers. Each step—soil, gravel, sand, and surface—must be done correctly for lasting stability.
- Accuracy matters more than speed. Careful leveling and spacing create a cleaner, more professional-looking result.
- Edge restraints and joint filling are key finishing steps that prevent shifting, spreading, and weed growth.
- Regular light maintenance helps preserve appearance and keeps the patio stable over time.
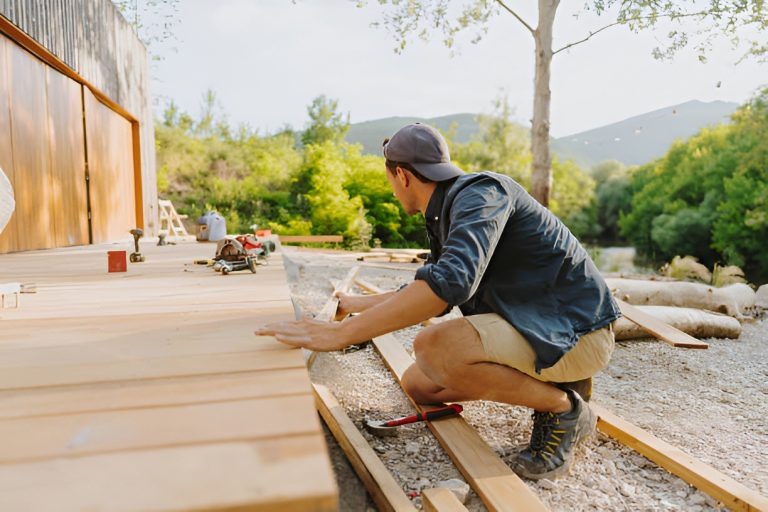
Building a patio is one of the most rewarding home improvement projects you can take on. It adds usable outdoor space, improves your lifestyle, and can even increase the appeal of your property when done right. The good news is that you don’t always need to hire a contractor. With proper planning, the right materials, and a step-by-step approach, many homeowners can build a patio themselves.
This guide breaks everything down in a practical, beginner-friendly way so you can move from idea to finished outdoor space without feeling overwhelmed.
Why Should You Build a Patio in the First Place?
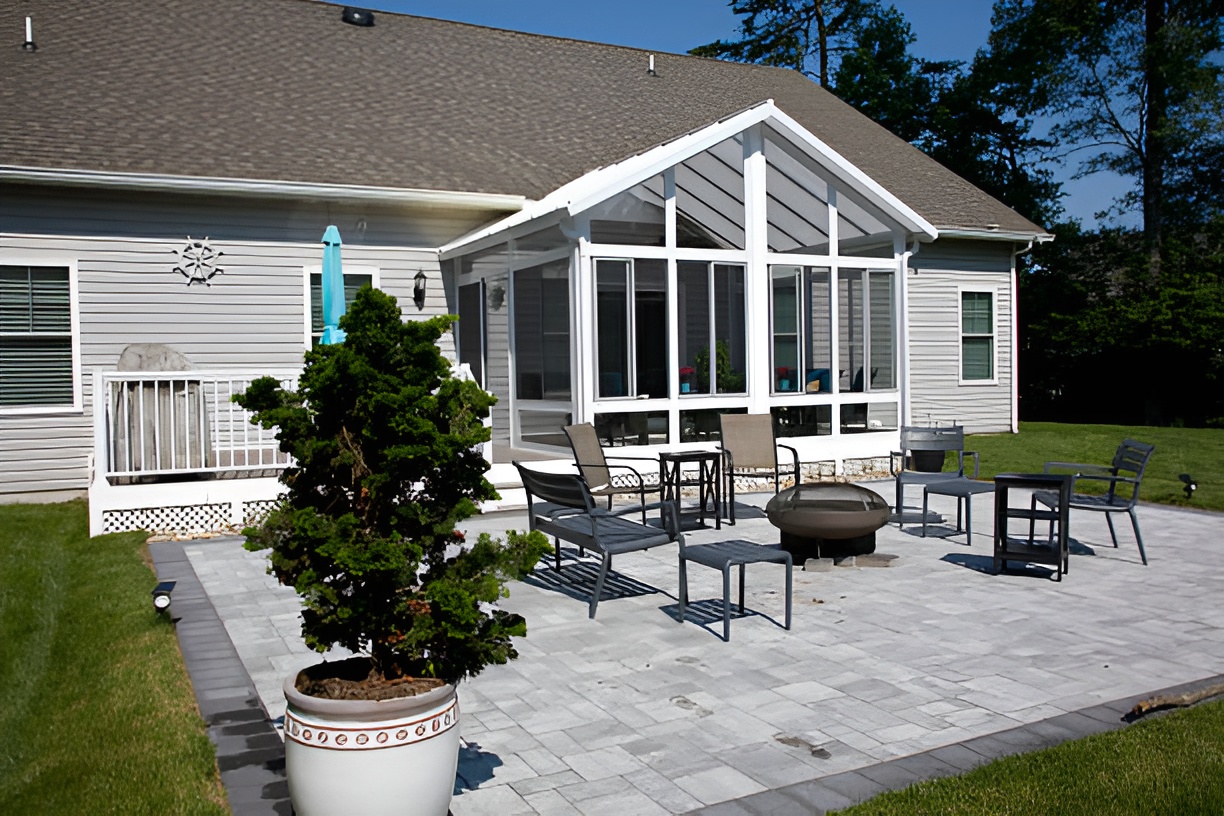
A patio is more than just a slab of stone or concrete in your backyard. It’s an extension of your home. Before jumping into the building process, it helps to understand why patios are such a popular upgrade.
A well-designed patio can:
- Create an outdoor dining or lounge area
- Improve your backyard’s usability year-round
- Add structure and purpose to unused yard space
- Increase curb appeal and outdoor aesthetics
- Support entertaining, grilling, or relaxing outdoors
Many homeowners also see patios as part of broader outdoor upgrades. In fact, some of the most impactful backyard improvements that boost home value include functional patios, outdoor seating areas, and well-designed landscaping zones that connect the home to the outdoors.
A patio isn’t just a weekend project—it’s a long-term investment in how you use your home.
What Type of Patio Should You Build?
A patio isn’t just a surface—it’s a design decision that shapes how your outdoor space feels and functions. Some options are better suited for DIY beginners, while others lean toward a more high-end or natural finish. Understanding the differences early helps you avoid unnecessary rework later.
Concrete Patio
A concrete patio is one of the most straightforward and durable options available. It’s created by pouring a solid slab that hardens into a strong, long-lasting surface. Because of its simplicity, it’s often chosen by homeowners who want something functional without too many design complications.
One of the biggest advantages of concrete is its versatility after installation. While it starts as a plain gray surface, it doesn’t have to stay that way. It can be stamped to mimic stone or brick, or stained to introduce color and texture, which gives you more design flexibility than many people expect.
Concrete works especially well in spaces that are large and flat, where laying individual pavers might be too time-consuming or expensive. It also tends to complement modern or minimalist home designs where clean lines and smooth finishes are preferred.
This option is often a strong fit for homeowners who are working with a tighter budget but still want a durable and permanent outdoor surface.
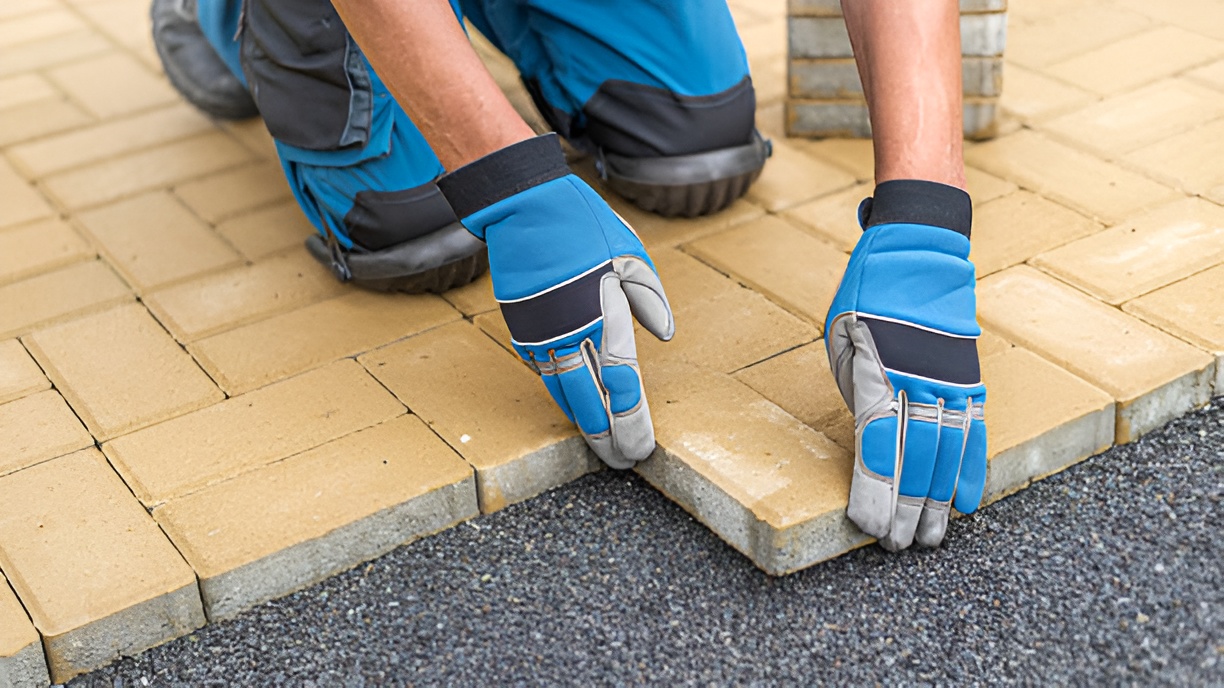
Paver Patio
Paver patios are one of the most popular choices for DIY homeowners because they strike a balance between flexibility, design control, and long-term durability. Instead of a single slab, this type of patio is made up of individual blocks—usually concrete, stone, or brick—that are laid in patterns and locked into place.
What makes pavers especially appealing is how customizable they are. You can create geometric layouts, curved edges, or intricate patterns depending on your style preference. This makes them ideal if you want your patio to feel more designed and intentional rather than purely functional.
Another advantage is repairability. If one section gets damaged or shifts over time, you don’t need to replace the entire surface. You can simply remove and replace individual pavers, which saves time and cost in the long run.
Pavers are particularly well-suited for homeowners who enjoy hands-on projects and want a patio that offers both structure and visual interest.
Gravel Patio
A gravel patio is the simplest and most budget-friendly option to install. It requires far less technical skill compared to other materials, making it an accessible choice for beginners or anyone looking for a quick outdoor upgrade.
Instead of solid surfaces or structured blocks, gravel relies on compacted ground and loose stone to form a usable outdoor area. It drains extremely well, which helps prevent water pooling and makes it a practical option in areas with frequent rain.
However, gravel does come with trade-offs. It tends to shift over time, meaning it may need occasional raking or replenishing to maintain an even surface. It’s also less formal in appearance, which makes it better suited for relaxed, casual outdoor spaces rather than polished entertainment areas.
This type of patio is often chosen for temporary setups, budget-conscious landscaping, or secondary outdoor zones like fire pit areas or garden seating corners.
Flagstone Patio
Flagstone patios offer a completely different aesthetic compared to the more structured options. Instead of uniform shapes, flagstone uses natural stone pieces that vary in size, texture, and color. This creates a more organic, high-end appearance that blends beautifully with landscaping.
Because each stone is unique, no two flagstone patios ever look exactly the same. This makes them especially attractive for homeowners who want something custom and visually distinctive rather than standardized.
Installation tends to be more detailed since each stone must be individually placed and leveled. However, the end result often feels more integrated with the surrounding environment, especially in gardens or nature-inspired yards.
Flagstone works best for homeowners who prioritize design and aesthetics over speed or simplicity. It’s often considered a premium option because of both material cost and installation effort.
Where Should You Place Your Patio?
Location is one of the most important decisions you’ll make. A poorly placed patio can feel awkward or underused, while a well-placed one becomes a natural extension of your home.
When choosing a spot, consider:
- Proximity to your kitchen or back door
- Sun exposure throughout the day
- Shade from trees or structures
- Privacy from neighbors
- Drainage and water flow in your yard
Think about how you’ll actually use the space. If you plan to eat outdoors often, placing the patio near your kitchen makes sense. If you want a relaxing retreat, a quieter corner of the yard may be better.
A good rule of thumb is to visualize your daily movement. The easier it is to access, the more you’ll use it.
What Tools and Materials Do You Need?
The tools you need depend on the type of patio you choose, but most projects require a similar set of basics.
Essential Tools:
- Shovel and spade
- Tape measure
- Level
- Rake
- Rubber mallet
- Wheelbarrow
- Plate compactor (can be rented)
- String line and stakes
Common Materials:
- Gravel base (crushed stone)
- Sand layer
- Pavers, concrete, or flagstone
- Edging restraints
- Landscape fabric (optional but helpful)
If you’re renting a plate compactor, it’s worth planning your project so you can complete the base preparation in one or two days. This helps ensure proper compaction and stability.
How Do You Prepare the Ground Properly?
Ground preparation is the part of the project that determines whether your patio lasts for years or starts sinking and shifting within months. It doesn’t look exciting compared to laying pavers or seeing the surface come together, but it’s where most of the real structural work happens. If you get this wrong, everything built on top of it will eventually reflect those mistakes.
The goal is to create a stable, well-drained, and tightly compacted base that won’t move over time, even after heavy rain or frequent use.
Step 1: Mark the Area
Start by clearly defining where your patio will sit. This is more important than it sounds because once you start digging, it becomes harder to make adjustments.
Use wooden stakes to mark the corners of your patio, then stretch string tightly between them to outline the shape. Walk around the perimeter and view it from different angles, especially from inside your home looking out. This helps you see whether the size and positioning actually feel right in the space.
At this stage, you’re not just measuring—you’re visually designing how the patio will integrate with your yard and home.
Step 2: Plan the Slope for Drainage
Before you remove any soil, you need to decide how water will flow across your patio. A flat surface might seem ideal, but in reality it causes water to pool, leading to staining, shifting, or even damage near your home’s foundation.
A slight slope is essential. The general rule is to drop about one inch for every four to eight feet, directing water away from the house.
To check this properly, use a long level or string line and simulate how rainwater would travel across the surface. It doesn’t need to be visibly slanted, but it does need to consistently guide water outward.
Step 3: Excavate the Soil
Once your layout and slope are set, the digging begins. This is where you remove everything down to stable ground. Grass, roots, and loose topsoil must all come out because they shift too easily and cannot support weight long-term.
The depth depends on your patio type. For most paver or gravel patios, you’ll be digging down around six to eight inches. If it’s a lighter-use area, you may not need to go quite as deep.
What matters most here is consistency. The depth should remain as even as possible across the entire area. Uneven excavation leads to uneven base layers, which eventually leads to dips or raised sections in your finished patio.
Step 4: Compact the Soil
After digging, the exposed soil needs to be compacted to create a firm foundation. If you skip this step, the ground underneath will naturally settle over time, causing your patio to shift or sink unevenly.
Using a plate compactor, go over the entire area slowly and methodically. You’ll want overlapping passes so that no section is missed. Pay extra attention to corners and edges since these areas often get less pressure during compaction but are just as important structurally.
The soil should feel firm and resistant when finished—not soft or spongy under pressure.
Step 5: Add a Separation Layer
At this point, many homeowners choose to lay landscape fabric. While not strictly required, it helps separate soil from your gravel base and reduces the chance of weeds growing up through the patio later.
It also helps keep your base materials from gradually sinking into the soil beneath. The fabric should be rolled out evenly across the entire area, with edges slightly overlapping so there are no gaps.
Think of this layer as long-term insurance for the stability of your patio.
How Do You Build a Solid Base?
If ground preparation is the foundation of your patio, the base layer is the structure that holds everything together. This is where durability is really determined. A properly built base prevents shifting, keeps the surface level, and ensures that your patio can handle weather changes and daily use without breaking down.
Step 1: Lay the Crushed Stone
The first layer of your base is crushed stone or gravel. This material is ideal because it locks together when compacted, forming a stable, load-bearing surface.
You’ll want to spread it evenly across the entire area, aiming for a total depth of about four to six inches. It’s important not to dump it all at once in a single thick layer. Instead, distribute it gradually so it can be leveled properly before compaction.
At this stage, precision matters more than speed. Any unevenness here will carry through every layer above it.
Step 2: Compact in Stages
One of the most important principles in patio construction is layering. Rather than compacting a thick gravel bed all at once, it should be built and compacted in smaller sections.
Add a couple of inches of gravel, compact it thoroughly, then repeat the process until you reach the full depth. This approach eliminates air pockets and creates a much denser, more stable foundation.
As you work, you’ll notice the surface becoming more solid and less prone to shifting under pressure. That’s exactly what you want.
Step 3: Recheck the Slope
After compaction, don’t assume everything is still perfectly graded. The process of pressing the gravel down can subtly change the slope, especially in larger areas.
This is the moment to double-check that water will still flow away from your home. If any areas have flattened out too much or shifted slightly upward, adjust them now before moving forward. Fixing slope issues at this stage is simple compared to correcting them after the patio is finished.
Step 4: Add and Level the Sand Layer
Once the base is solid and properly sloped, a thin layer of sand is added on top. This layer doesn’t provide structural strength but instead acts as a precise leveling bed for your final surface.
The sand should be spread evenly and then carefully leveled using a straight board. This process, known as screeding, creates a smooth and consistent surface for pavers or stones to sit on.
It’s important not to walk directly on this layer once it’s leveled, as even small footprints can create uneven spots that affect the final look.
How Do You Lay Pavers or Stones Correctly?
This is the stage where your patio starts to feel real. The groundwork is done, and now you’re building the visible surface. Even though it’s more visual and creative, accuracy still matters because small inconsistencies become obvious across a large surface.
Working With Pavers
When laying pavers, start from a fixed edge such as the side of your house or a straight boundary line. This gives you a reference point to keep everything aligned as you move outward.
Each paver should be placed carefully into the sand bed and gently tapped into position with a rubber mallet. The goal is to create a tight, even surface with consistent spacing between each piece. If the spacing starts to drift, it will become noticeable as the pattern expands.
Throughout the process, regularly step back and check alignment from different angles. It’s easy to get focused on individual pieces and lose track of the overall pattern.
Working With Flagstone
Flagstone is more irregular, which makes the process feel more organic but also slightly less predictable. Instead of following a strict grid, you’re essentially fitting natural shapes together in a way that feels balanced.
You’ll often need to adjust the sand underneath each stone individually to ensure it sits level. Larger stones should be placed first since they define the structure, with smaller pieces filling in the gaps.
The key is not forcing symmetry. Flagstone looks best when it feels natural, but still stable underfoot.
Working With Concrete
If you’re pouring concrete, the process is more time-sensitive. Wooden forms must be set up first to define the shape and hold the concrete in place. Once poured, the surface needs to be leveled quickly before it begins to set.
This method requires more coordination and speed, which is why it’s often less forgiving for beginners compared to pavers or stone.
How Do You Finish and Secure the Patio?
Once the main surface is installed, the patio might look complete, but it’s not fully stable yet. The finishing stage is what actually locks everything into place and ensures the structure holds up over time. Without these final steps, even a well-laid patio can slowly shift, develop gaps, or become uneven after a few seasons of weather and foot traffic.
Step 1: Fill Joints
After all pavers or flagstone pieces are set in place, the gaps between them need to be filled. These joints may look small, but they play a major role in keeping the entire surface stable.
Start by sweeping dry sand across the patio surface, working it into the joints using a push broom. This process usually needs to be repeated several times because the sand settles into hidden gaps as you work. It’s important to make sure every joint is fully filled, not just the visible surface layer.
For stronger long-term results, many homeowners use polymeric sand instead of regular sand. This type of sand contains binding agents that activate when watered lightly, causing it to harden slightly and lock the pavers in place. It also helps reduce weed growth and prevents ants or insects from disturbing the base.
Once the joints are filled, avoid rushing to the next step until you’re confident the gaps are completely saturated and level.
Step 2: Compact Again
After joint filling, the entire surface needs to be compacted again to settle the materials into their final position. This step helps eliminate tiny shifts that happen during installation and ensures the pavers or stones are fully seated into the bedding layer beneath.
If you’re working with pavers, use a plate compactor fitted with a protective pad to avoid scratching or damaging the surface. Move slowly and evenly across the patio, making overlapping passes so no section is missed. You may notice sand working its way deeper into the joints during this process, which is exactly what you want.
For flagstone, compaction is lighter or sometimes done manually depending on the thickness and stability of the stones. The goal is not to force movement but to gently settle everything into a tight, unified surface.
After this step, the patio should already feel more solid underfoot.
Step 3: Edge Restraints
Edge restraints are one of the most important structural features of a patio, even though they’re often overlooked. Without them, the outer edges of pavers or stones can slowly shift outward over time due to foot traffic, weather changes, or natural ground movement.
To install them properly, place the restraints tightly along the entire perimeter of the patio. They should sit flush against the outer row of pavers or stones to keep everything locked in place. Once positioned, they are secured into the base layer using long spikes driven into the ground at regular intervals.
It’s important to make sure the restraints follow the exact shape of the patio, especially if you have curves or irregular edges. Any gaps between the edge pieces and the patio surface can eventually lead to movement or separation.
This step essentially acts as the frame that holds the entire structure together.
Step 4: Final Cleaning
The last step is about presentation and minor adjustments. After all the construction work is done, there will likely be leftover sand, dust, or small debris sitting on the surface.
Begin by sweeping the entire patio thoroughly to remove excess sand from the surface and ensure the joints are neatly finished. This not only improves appearance but also helps you identify any uneven spots or areas that may need a little extra filling.
If you used polymeric sand, you may also need to lightly mist the surface with water to activate the binding process, depending on the manufacturer’s instructions. Be careful not to overwater, as this can wash sand out of the joints.
What Mistakes Should You Avoid?
Even experienced DIYers can run into problems. Here are common mistakes to watch out for:
- Skipping proper excavation depth
- Not compacting the base enough
- Forgetting drainage slope
- Using uneven sand layers
- Rushing paver placement
- Ignoring edge restraints
One of the biggest issues is impatience. A patio isn’t difficult, but it does require careful layering and leveling.
How Much Does It Cost to Build a Patio?
Costs vary widely depending on size and materials.
Here’s a rough breakdown:
- Gravel patio: lowest cost, mostly labor and base materials
- Paver patio: moderate cost, depending on stone type
- Concrete patio: mid-range, but varies with finishing
- Flagstone patio: highest cost due to material price
DIY patios can save a significant amount compared to hiring a contractor, especially on labor.
Can You Customize Your Patio Design?
Absolutely. Once you understand the basics, customization becomes the fun part.
Ideas include:
- Built-in seating walls
- Fire pits
- Outdoor kitchens
- Planter borders
- Multi-level patio layouts
- Lighting features
You can also mix materials, like combining pavers with gravel borders for contrast.
Design choices help your patio feel like a natural extension of your home rather than an add-on.
How Do You Maintain a Patio Over Time?
A well-built patio doesn’t require much maintenance, but a little care goes a long way.
Maintenance tips:
- Sweep regularly to remove debris
- Refill joint sand as needed
- Check for shifting stones annually
- Clean stains early before they set
- Pressure wash lightly once or twice a year
For gravel patios, occasional raking helps maintain even distribution.
When Is It Worth Hiring a Professional?
While many patios are DIY-friendly, some situations may require professional help:
- Large or complex layouts
- Sloped or uneven terrain
- Drainage issues
- Heavy structural additions (like retaining walls)
- Limited time or tools
Hiring a pro can save time and ensure long-term durability, especially for high-end designs.
Final Thoughts: Is Building a Patio Worth It?
Building a patio is one of those projects that pays you back in daily use and long-term value. It transforms your backyard into a functional living space and opens up opportunities for relaxing, entertaining, and enjoying your home more fully.
With careful planning, the right materials, and attention to detail, even beginners can create a patio that looks professional and lasts for years.